Budgets (Professional)
1. Budgets:
1.1 Create Budget:
1.1.1 Budget info:
1.1.2 Expense accounts:
To add a budget account, start by clicking on the in the middle of the form and a side window will appear as shown below:
Begin by selecting the appropriate expense account from the drop-down list (these are customizable via Settings -> Customize Data), set the budget amount, and add remarks if wanted. Finally click on
Click on one more time to advance.
1.1.3 Workspace limits: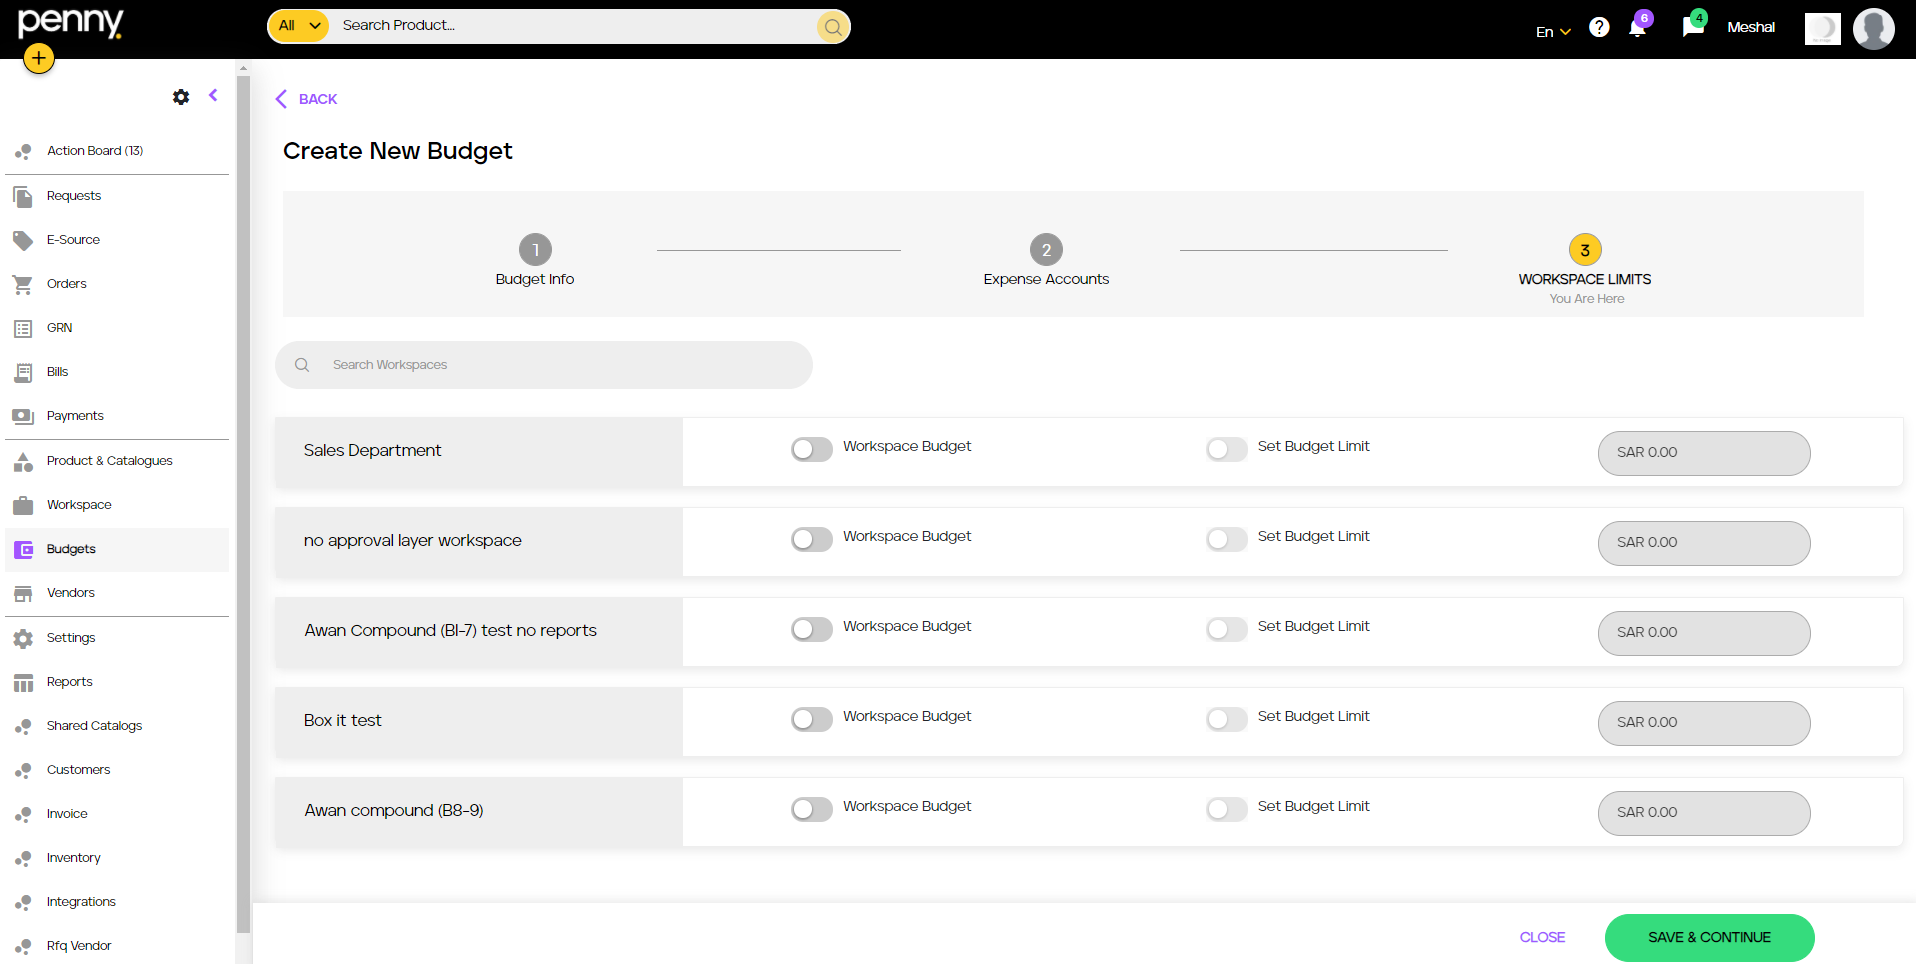
In here, we are able to set individual budgets for each workspace from the budget amount entered.
To set the budget to be used for a specific workspace, click on switch that corresponds to the workspace. And to set a limit, click on the
switch, then enter the amount.
Finally, click on to complete the budget creation.
1.2 Edit Budget:
Hover over the button in the top right corner.
Click on the budget ID that corresponds to the budget we wish to edit
Click on in the top right hand corner
Finally, follow the steps previously covered in section 1.1 (Create Budget). Once the changes are applied, click on to save and a message will appear confirming the changes
Related Articles
GRN (Professional)
In GRN (Goods Received Note), the user is able to confirm the deliveries of products and goods. To access GRN module, click on on the left side panel Click on the most recent Order pending to access the GRN for the recently created Order In this ...Requests (Professional)
1. Requests (Without Approval): This section will assume completion of previous sections as it is necessary to have a vendor, a product and a workspace. This section will cover the following: Modules: Requests. E-source (RFQ). Vendor Quotations ...Approvals (Professional)
1. Request To payments (With approval layers): This section will assume completion of previous sections as it is necessary to have a vendor, a product and a workspace. This section will cover the following: Modules: Requests Approval E-source (RFQ) ...Bills (Professional)
In the Bills module, the user will be able to review and submit bills for the goods received to be paid in the payment module. To access the Bills module, click on Bills in the left panel. Now click on the pending bill, highlighted in purple In the ...Payments (Professional)
In the Payments module, the payment process can be done as well as processing of bills. To access Payments, click on in the left panel Click on the partial bill required to complete the payment for, which are highlighted in purple. Click on the ...